Special Feature: Products Sally Recommends
The Old Softies: Pudding and Custard
 Pudding. Custard. Both are dairy-based desserts with variants that cycle in and out of fashion. Though often associated with childhood, either, if well-made, is a worthy ending to a good meal. But do you know the differences between pudding and custard, and how about the various forms of custard-like desserts which appear so often on menus these days? Time to find out more….
Defining Terms
I need to specify that I’m talking about American-style puddings here, because UK-style puddings, which come in variations such as Sticky Toffee Pudding, Black Pudding, and Summer Pudding, can be very different. In the UK, “pudding” is often a generic term for dessert, but then again there are countless recipes for specific desserts called puddings, or those referred to as puddings, like Spotted Dick or Trifle. To add to the confusion, there are foods called puddings that aren’t sweet at all, such as the aforementioned Black Pudding, which is actually a form of blood sausage. Sweet puddings in the UK, according to the Project Britain website (https://resources.woodlands-junior.kent.sch.uk/customs/questions/food/puddings.htm), all begin “with the same basic ingredients of milk, sugar, eggs, flour and butter”. Many of these sweet puddings call for fresh fruit (such as raspberries or strawberries), heavy cream, cake, and, yes, custard.
So what are the differences between pudding and custard? My Webster’s New Collegiate Dictionary unhelpfully defines custard as “a pudding-like, usually sweetened mixture of eggs and milk” and pudding as “a dessert of a soft, spongy, or thick creamy consistency”. But the truth is that defining the two isn’t so simple. An article at the website Chow.com (https://www.chow.com/food-news/54986/whats-the-difference-between-custard-and-pudding/) notes that “the classic American dessert known as pudding is a sweetened milk mixture thickened with cornstarch, then cooked. It has no eggs in it…”. Custard, the article continues, is “pudding’s eggy cousin”. I have a problem with this definition, because I’ve never made a pudding from scratch that didn’t contain eggs. However, the article notes that there is a great deal of overlap between the two categories. Le Cordon Bleu’s Professional Baking Manual states that a custard is set or thickened solely by the coagulation of egg protein. I find that a sensible way to distinguish the two, if you’re willing to allow for the existence of hybrids.
Custard
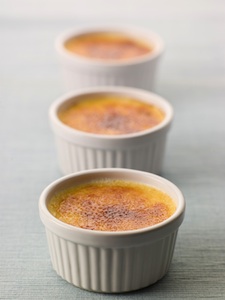
Custard has many forms. It can be baked in the oven or stirred on the stovetop (while this is sometimes called “boiled custard”, you don’t ever want to boil it). Crème brulee, the currently-popular dessert with a caramelized sugar topping, is a custard. Pot de crème is a very rich custard, typically served in small portions. Often flavored with chocolate, pot de crème is usually baked, then served chilled. Spanish-derived flan, with its surface coating of caramel sauce, is another custard, as is crème caramel, the French equivalent. I’ve seen an argument, too, that cheesecake is really a custard; food writer Andrew Schloss once pointed out that the ingredients are eggs, sugar, and cream cheese (instead of cream or milk).
What about the dessert called “frozen custard”? Yes, it is indeed a custard that’s frozen; it contains milk or cream, egg yolks, sugar, and flavoring(s). Some ice cream is custard-based, as well; French-style ice cream (also called custard-style) contains eggs, while Philadelphia-style ice cream, also called New York-style or American-style, does not. (Incidentally, if you’re wondering about the differences between ice cream and frozen custard, Wisegeek.com declares that frozen custard typically has a higher percentage of butterfat, must contain egg yolks, and is churned more slowly than ice cream, so less air (or “overrun”) is incorporated into frozen custard.) And gelato? Gelato can include eggs but doesn’t always, so it might or might not be a custard.
Pudding
While everyone is familiar with stovetop puddings thickened with cornstarch, there are other types. Tapioca pudding is thickened with starch from the cassava plant (by the way, if you’ve never had tapioca pudding, please don’t dismiss it! A good tapioca pudding is a joy, and chocolate or mocha tapioca pudding is one of my comfort foods from childhood). Rice pudding can be baked or made on the stovetop, and the rice used can be cooked or raw. Most rice pudding recipes that I’ve seen use eggs, so clearly some of the thickness depends upon coagulation of egg proteins, but where raw rice is used, the starch in the rice lends some thickness to the end product, too. And of course there’s much-loved bread pudding, where a custard mixture is allowed to soak into (preferably stale) bread before the pudding is baked.
Cooking Precautions
Custards and puddings are deceptively simple. With comparatively few ingredients, they seem as though they should be child’s play to make. In fact, you must guard carefully against overheating any custard; if it is cooked too long or at too high a heat, the egg protein will coagulate excessively. This can result in scrambled eggs and watery, tough custard. Cornstarch puddings can be on the tricky side, too. If you overheat or overbeat a cornstarch pudding, it will thin out and refuse to thicken again. At the same time, you need to be sure that the starch is fully gelatinized, which will ensure proper thickening of the pudding and eliminate any taste of uncooked cornstarch. As is the case with many things in life, however, a little practice can go a long way in helping you realize what works and what doesn’t. While you do need to watch what you’re doing, I find making pudding and custard very rewarding.
In general, with the exceptions of cheesecake and ice cream/frozen custard, neither custards nor puddings are especially good “keepers”; plan to use them within a day or two after you make them. And with those same exceptions, none of the custards or puddings I have discussed above can be frozen.
Dairy-Free Variations
While I understand that some people don’t want to eat dairy products these days, and others can’t, the non-use of dairy products puts one at a distinct disadvantage where custards and puddings are concerned. I’m trying to remember if I’ve ever tried a dairy-free custard, but I don’t think I have. As for dairy-free puddings, I’ve tried a number that were soy-based, but even the best of those was just OK. There are quite a number of recipes online for vegan puddings, but I haven’t tried any (in part, that’s because I know some of the recipes I’ve seen won’t work). Of all the recipes like this I’ve found, those that call for using a non-dairy “milk” in bread pudding seem to me to have the best chance of success, but if there’s something else that works for you, I’d love to know about it.
Chocolate vs. Non-Chocolate
There’s a reason that chocolate is our favorite flavor, but I’d urge you to try custards and puddings in other flavors, too. I’ve sampled everything from an orange crème brulee to a peanut butter pudding to a vanilla crème anglaise (yup---crème anglaise is a custard) poured over perfectly ripe strawberries. I’ll order chocolate puddings and custards much of the time, myself, but it’s always good to branch out once in a while.
Recipes
For those who can consume dairy products, here are a couple of recipes to get you started...
Dark Mocha Crème Brûlée
While many people use a palm-sized torch with butane fuel to caramelize the sugar atop these custards, I regard butane as a dirty-burning fuel and don’t like to do that. Instead, I use a propane torch that I got from a local hardware store. I had never worked with a propane torch before developing this recipe, but once I started it was so much fun that I made crème brulee every day for two weeks straight, just so I could use the torch.
Whatever kind of torch you use, please read and follow the manufacturer's instructions very carefully! While many crème brûlée recipes for home cooks instruct you to caramelize the sugar topping under a broiler, I have an untrustworthy broiler, so I use a torch instead. If you do decide you want to use a broiler to caramelize the topping, you'll have to bake the custards in individual, ovenproof ramekins (such as miniature soufflé dishes); custard cups cannot be used under a broiler as far as I know. Important: Do not substitute brown sugar for the granulated sugar in the topping! I tried this, and when the torch was applied the brown sugar caught fire almost immediately.
The caramelized sugar topping is pretty, even against the dark custard. You'll know it's there, especially when you dig in and it shatters. After the sugar topping has been caramelized, some people like to serve crème brûlée right away, but I don't. I think the custard is best when very cold, so I'll put the brûlée back into the fridge for at least an hour (the custards can stand in the fridge for up to 6 hours after they're topped, as long as they remain uncovered). The custards themselves can be made a day or two in advance, then kept, covered, in the refrigerator. If any condensation forms on the custard surface, blot it up gently with a paper towel before applying the topping. This dessert is very rich, and it would be best after a light meal.
6 ounces best-quality bittersweet chocolate, finely chopped
Pinch salt
1 cup heavy cream
5 egg yolks, from eggs graded "large"
1/3 cup plus 2 Tbsp. sugar
1 Tbsp. plus 2 tsp. unsweetened Dutch process (alkalized) cocoa powder
3/4 tsp. instant espresso powder
3/4 cup plus 2 Tbsp. milk
1 Tbsp. vanilla
For Topping:
12 teaspoons granulated sugar
Have ready 6 ovenproof glass custard cups, each of 6 ounce capacity. Tear off a square of foil to completely cover the top of each cup, folding any excess down over the outer edge of the cup. If any foil overhang comes more than about 1 inch down the side of any cup, trim it so there is an inch or less of overhang. Have ready a baking pan at least 1-1/2 inches deep, into which all 6 cups can fit without touching one another or the sides of the pan; you'll also need enough simmering water to fill the pan to a depth of 1 inch. If the baking pan is aluminum, sprinkle about 1 teaspoon cream of tartar into the bottom to prevent discoloration. Have ready a fine-meshed strainer and a heatproof measuring cup or pitcher of at least 3-1/2 cup capacity. Set everything aside. Adjust rack to center of oven; preheat oven to 300 degrees F.
In small heatproof bowl, combine finely chopped chocolate and salt. In small saucepan over low heat, heat cream just to a simmer, stirring occasionally; remove from heat. Pour about half of hot cream over chocolate. Let stand for a minute or two, then stir or whisk very gently until smooth. (If necessary, place bowl of chocolate over simmering water on low heat—water should not touch bottom of bowl—and stir often until chocolate is melted and mixture is smooth. Remove from heat and hot water.) Gradually stir or whisk in remaining cream. Mixture should be warm, not hot.
Place a medium heatproof bowl on a pot holder or folded kitchen towel. Into the bowl, place the egg yolks; beat with fork until well-combined. Beating constantly with fork, gradually add warm chocolate mixture to yolks.
In small, heavy-bottomed, nonaluminum saucepan, combine 1/3 cup plus 2 Tbsp. granulated sugar, cocoa powder, and espresso powder. With small whisk, whisk well to combine. Add 2 Tbsp. milk (reserve remainder); mix well to make a smooth paste. Gradually stir in remaining milk. Set over medium heat. Stir very frequently just until mixture reaches a simmer. Remove from heat.
Stirring chocolate-yolk mixture constantly, very gradually add hot milk mixture. Scrape bottom and sides of bowl with rubber spatula after about half of hot milk mixture has been added, then continue adding hot milk mixture, stirring chocolate-yolk mixture constantly, until all has been incorporated. Stir in vanilla. Custard will be on the thin side.
Place fine-meshed strainer over heatproof measuring cup or small pitcher; strain custard into pitcher (you should have about 3 cups). Divide custard evenly between custard cups, then cover each custard cup with a foil cover.
Place baking pan on oven rack; carefully pour in enough simmering water to form a thin layer on the bottom. Carefully transfer filled, covered custard cups to baking pan; gently add more simmering water to baking pan, pouring it carefully around (not on top of) cups, to a depth of 1 inch (you might want to measure the water depth, as too much water will slow baking time).
Bake 45 minutes. After about 30 minutes, check baking pan; if more simmering water is needed to maintain the 1 inch depth, add it now. After 45 minutes, CAREFULLY remove baking pan from oven—it will be hot and heavy. Using pot holders, remove each custard cup individually from the water (it might help to use a spatula to do this) and transfer to a cooling rack. Remove foil covers from custards. Custard tops will be shiny and very dark; when tapped gently, custards will seem just set. Cool briefly at room temperature, then chill until very cold (at least 4 hours), covering tightly with foil covers or plastic wrap after 2 or 3 hours. Chill until needed.
In preparation for the topping of the crèmes brûlées, please read manufacturer's instructions for your propane torch at least twice. Make sure the area in which you'll work is well-ventilated, but not drafty. Assemble the torch (if necessary) just before use. Sprinkle 2 tsp. of granulated sugar on top of each custard as evenly as possible. Take your time doing this. Do not sprinkle sugar randomly, then tap the custard cup to try to distribute the sugar, as too much sugar will settle toward the middle if you do. Place sugared custards on a stable, flat surface with a lot of cleared space around it. I place mine on a sturdy metal cooling rack on top of a 6 quart, wide mouth pot.
Ignite the torch. You only need a flame a few inches long, but it should be blue, not orange. Play the flame lightly but completely over the sugar on top of each custard; the nozzle of the torch should be several inches above the sugared surfaces at all times. When the sugar on one custard starts to smoke, move to another area or another custard; you can always go back over an area, and you need to give the sugar a few seconds to react to the flames. You're trying to caramelize the sugar to a rich golden brown, but not burn it. If necessary, shut the torch off for a minute, then check the custards to see which areas require more flame before re-igniting the torch to caramelize those areas. Even with your best effort to keep the sugar topping as even as possible, some of the sugar will be blown around on the custard surface a bit, so you'll get areas of heavier and lighter topping on any one custard— OK. When you're finished caramelizing the toppings, shut off the torch and put it aside in a safe area to cool off. Allow the custards to cool for several minutes, then carefully, using pot holders (the top portion of the cups will get hot), replace the cups in the fridge. Chill at least 1 hour, uncovered (or up to 6 hours), before serving. (If you wish, you can serve the cremes brulees immediately after caramelizing the tops.)
6 servings
Basic Chocolate Pudding
1/2 cup granulated sugar
1/4 cup unsweetened Dutch process
OR regular nonalkalized cocoa powder (see Note)
2 Tbsp. cornstarch
Pinch salt
2 egg yolks, from eggs graded "large"
2 cups whole milk
2 tsp. vanilla
Optional for Serving:
Lightly sweetened whipped cream![]()
Set a strainer over a pitcher or liquid measure of about 3 cup capacity. Set four to five ramekins or custard cups of 2/3 to 3/4 cup capacity near stovetop. Combine sugar, cocoa powder, cornstarch, and salt in heavy-bottomed, nonreactive, 1-1/2 to 2 quart pot. With whisk or slotted spoon, stir well to combine, pressing out any lumps.
In small bowl, combine egg yolks and about ¼ cup milk (no need to measure). With fork, beat to blend well. Off heat, add to sugar mixture in pot; stir gently to combine. Press out any cocoa lumps with rubber spatula. You want a smooth paste; you may need to add a little more milk to achieve that. Gradually add remaining milk to pot, stirring gently but constantly. Scrape sides and bottom of pot with rubber spatula.
Place pot over medium heat. Stir gently but constantly. There will be a thin layer of foam on top of the pudding at this stage--OK. Just before the pudding boils, it will thicken and become lumpy--also OK. Just keep stirring gently but constantly. Stop stirring momentarily to check for boiling; when mixture boils, boil and stir gently for 1-1/2 minutes, reducing heat if necessary to keep pudding at a low boil. Remove from heat. Gently stir in vanilla just until blended. Immediately pour into strainer set over pitcher.
When strained, immediately divide pudding evenly among ramekins. To prevent formation of a top "skin", place a piece of plastic wrap, pierced in several spots, directly on the top surface of the pudding. Cool for a few minutes, then chill until set, at least 2 or 3 hours. If desired, garnish with lightly sweetened whipped cream just before serving.
4 to 5 servings
Note:
Either Dutch process or regular nonalkalized cocoa powder will work in this recipe![]() . The Dutch process cocoa yields a much darker, more chocolatey pudding. If you wish a more bittersweet pudding, increase the amount of cocoa powder used to 1/4 cup plus 1 Tbsp.
. The Dutch process cocoa yields a much darker, more chocolatey pudding. If you wish a more bittersweet pudding, increase the amount of cocoa powder used to 1/4 cup plus 1 Tbsp.
![]()
Stephanie (HandOverTheChocolate@comcast.net) has had a strong affinity for chocolate from a very early age. Family members claim that, as a child, she was able to hear chocolate being opened in the kitchen no matter where she was in the house. Stephanie was baking by the time she was 6 and ran a short-lived baking business out of her parents’ kitchen when she was in high school. She has a Master’s Degree in Foods from Virginia Tech but no formal training in cooking or baking. Consequently, she is a home cook, not a chef. Prior to beginning this column, she had written about chocolate for some 8 years.
Note: This information was accurate when it was published. Please be sure to confirm all rates and details directly with the businesses in question before making your plans.


